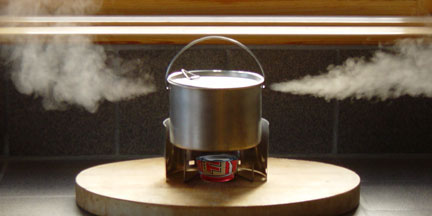
Replacement for the Original Penny:
Now that Heineken is no longer making those wonderful Keg cans, its time for me to present a Penny Stove that uses regular cans. I chose Tecate beer cans because there were many in my recycle bin and you can find the same can shape everywhere. Also, I liked the depth of the bottom dish, the soft exterior fold of the raised ring, and the way the top ring fit snugly over the bottom ring. You can use other standard cans, but since many are slightly different, the results may be slightly different.
So, after much building and testing and inspiration from dr.ir. Niek Lambert) I have perfected a competitive replacement for the original Penny. The 2.0 looks and performs much like the original and used the same construction techniques - not surprising since regular cans were use for the original testing. The 2.0 primes faster, is lighter and smaller, and is easier to make - but not as indestructible as the original.
A typical test:
Using two cups of 70° water and 30 ml of fuel (one ounce or two tablespoons), half in the stove and half covering the penny on top, showed the following results:
0.0 - light the stove
1.5 min - jets light fully
2.0 min - top fuel drains under penny
4.5 min - water starts to boil
5.0 min - simmer ring dropped onto stove
5.0 min - 20 min. - full boil continues
21 min - stove out of fuel
If you've made a Heineken Penny before:
Basically its the same construction technique, with the cup 1 1/8" tall, and the burner 3/4" tall. The simmer ring is 3/4" tall strip, and the base is 1/2" tall - cut from the top of the can. The pot support is the same - holding the pot 1" from the cup top edge of the stove making it about 2 1/2" high.
Materials:
Two Tecate beer cans and one penny.
knife (exacto), scissors, drill with 1/16" bit ( or short push pin).
Other helpful stuff includes a Sharpie, a small book, and needle nose pliers.
You will also need a wind screen and pot support used with the original stove.
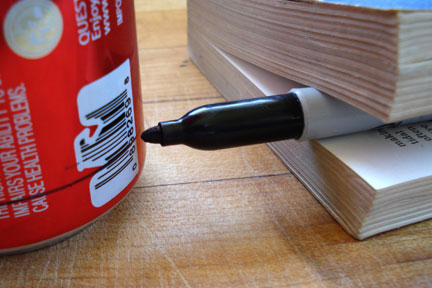
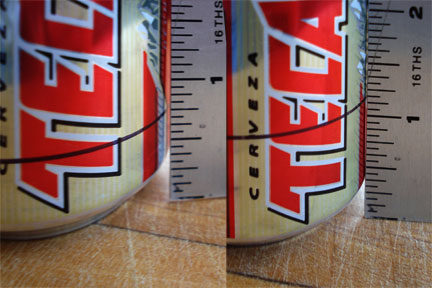
Mark & cut the cans:
Use a Sharpie (or knife) trapped in a book to mark one can 1 1/8" from the top for the cup, and another 3/4" fro the burner.
Using the knife or point of the scissor, rough cut both cans in half.
Use the scissors to spiral down to the Sharpie line and make a clean cut. Wash the inside of both cups to remove any dried beer.
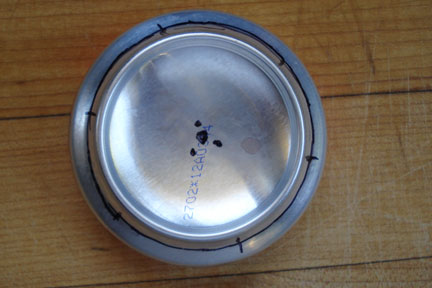
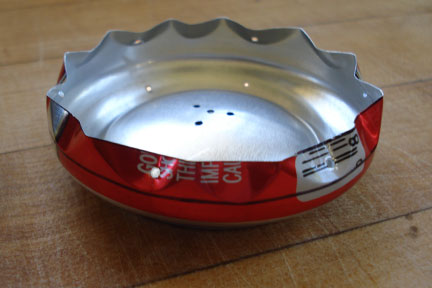
Mark & drill the jets:
Mark the bottom center of the burner ( 3/4" high cup). Spin the can and expand the dot until it is centered, then add three dots just outside the center.
Mark the crease just outside the ring, then add 6 equally spaced marks. Start with two across from each other Check to make sure they align with the center dot.
Then, add two equally spaced on each side. Again, use the center dot to line these up - expanding the dots to adjust jet locations.
Use a 1/16" bit to drill the 6 outside holes and 4 center holes. Make sure the drill is 90° from the surface - start slow then drill fast. If you use a push pin, bend to open up and expand the hole slightly.
Make 12 Dimples in the burner:
Turn the burner over and mark a line half way up the flat side of the burner. Using this as a guide, use needle nose pliers (or fingers) to bend down the edge - use the 6 jet holes as a guide. Then, bend down 6 more centered between the jets. Adjust these dimples and bend in any high points extending outside the radius of the can. Finally, drill a 1/16" hole in the dimple above each jet hole.

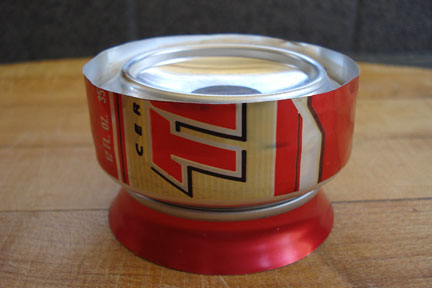
Press the burner into the cup:
Put the burner in the freezer (stream or snowbank) for 5 minutes. Then put the cup on a trivet (hot pot or hot rock) to warm it up. Remove both and force fit the burner into the cup. I like to slowly tap the burner down using a wooden stick or spoon. Some like to put the burner face down and hand force the cup over the burner. Once burner is flush with the cup lip, carefully drive it to the bottom using the top of an empty can. The burner ring should sit about 1/8" below the top edge of the cup when it hits bottom. If the burner was made carefully, there should be a tight smooth ridge all the way around. If not, it will leak and you will need to fill it with JB Weld epoxy.
Cut the base:
At this point you will want to light it, but the base is an integral part of the burning process - it insulates stove allowing it to prime automatically and burn evenly. it also raised the stove the optimum distance from the pot, and acts as a top to hold the penny in when traveling.
If the can has been opened, bend the tab back to fill the hole. Then spin and break off the poptop tab. If you want an intact hole, drink the beer from a hole in the side of the can - best to do this when you're alone.
Turn the can top upside down and make a Sharpie mark 1/2" from the table. Cut here to make the base.
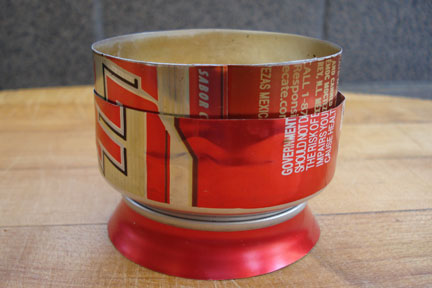
Cut the simmer ring:
Mark and cut a the second can top to make a smooth level cut. Mark and cut again to make a 3/4" strip of aluminum. Wrap this into a tight spring to overlap the edges. Adjust the size until it fits perfectly into the inside edge of the cup.
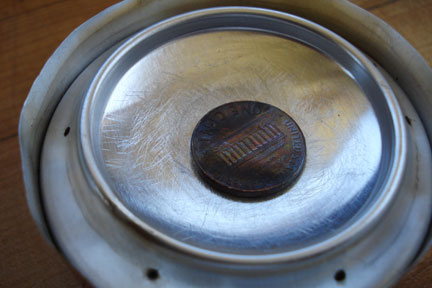
Set the penny:
To make sure that the penny seals the center holes, grind the penny around the center of the cup with your finger. It will grind off any stamped numbers - soon you will feel a smooth fit that will hold fuel in the top of the stove.
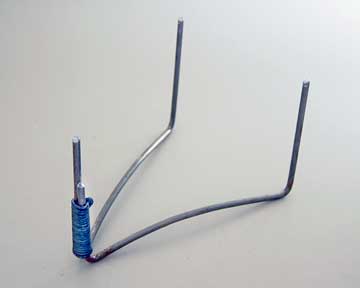
Pot support and wind screen:
You can use any of the original pot supports shown on this site. It should hold the pot 2 1/2" high and/or 1" from the top cup lip.
Any wind screen will work as long as there is a good air supply at the bottom or side and it leaves at least 1/2" gap around the pot. I prefer a screen that leaves an opening so that I can see the stove and slide it in and out between the pot support.
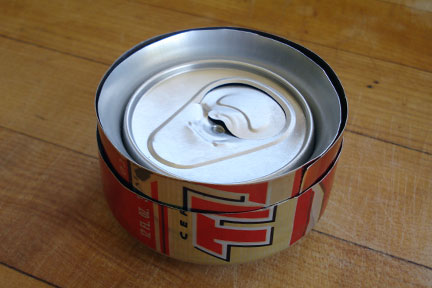
Packing for travel:
Put the simmer ring in place, then set the base ring side down onto the stove. Note that the simmer ring and base are flush and both help the protect the stove cup edge. I wrap this in a paper towel and cary it in my pot and/or cup.
Lighting the stove:
For best results, put about half of the fuel you intend to use inside the stove and half on top - covering the penny. That way you have fuel for the priming flame, and fuel to start the boil inside. For standard 20 ml (2/3 oz.) burn, fill the center cup then slide the penny aside and let it run into the stove. Then refill the center cup to overflowing - fuel should run over to cover the jets. Light immediately. The stove should already be under the pot support so that it is not moved. Put pot and wind screen on immediately - the reflected heat will help get things going. Don't forget the base and have the simmer ring ready to drop as soon as the jets light, or water boils.
To extinguish the flames instantly:
At any time in the process, lift the pot, slid the pot support away, and set the pot on the stove. Once cooled you can pour remaining fuel back into your container. This makes it one of the safest backpacking stove ever made - IMHO.
You may want to also review the Instructions & FAQ's page for production and performance tips.
|